
This is how I took the photos… (I’m not a pro so others will be able to improve on this method.)
Lighting
I take all my photos on a table in my conservatory. I get good natural light in there, and on a sunny day I get good naturally-strong shadows too (but I have to watch out for shadows cast by the conservatory window frames). On occasion, when there is no wind, I will also step outside to take the images.
Set Up & Background
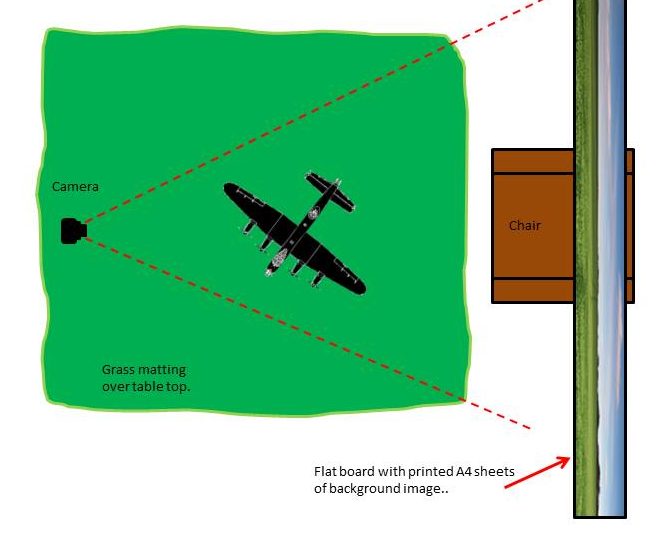
Surface: Over the table top I lay a Games Workshop roll of grass about 4ft wide (1.2m) and about 6ft long (1.8m). See picture below. In some cases I will add some grey card. or a sheet of hardboard or ply. In the case of my P-51K I added a small handful of building mortar (fine, gritty sand and cement powder) and roughly spread it around. Take a look at the examples below. The point is, I really didn’t spend a lot of time creating a detailed base.
Background: I selected a high resolution picture from the internet as a background. It must be as high a resolution as you can find since it is going to be blown up/enlarged quite a bit. I think I used one of an actual airfield in the UK. in some examples I used my own picture taken of a field and the hedges on it’s far side (off the road just south of Lechlade – at about here). It’s important to get the right image with a very simple grass field foreground and hills and sky in the background. The angle at which the image was shot is also important. I can’t explain this too well, but you want something shot from a low angle with less of the foreground in view. In some cases I just used the top half a suitable image. The image was then printed off on 5 portrait sheets of A4 paper (I don’t have a large format printer, only a little old Ink Jet – anyone with a colour printer should be able to manage this – you may need to find and play with advanced settings to get the image to print across multiple sheets). These sheets are then glued with spray-on mounting glue onto a thin sheet of plywood (anything will do really – so long as it’s clean and smooth). The background image on its board is propped up on a chair’s arms and back. The slight angle helps it get some natural light too.
Camera & Settings
The camera used for most of my shots is an old Sony Cybershot 4.1 mega pixel ‘point and shoot’ thing with some basic settings/options/adjustments. It has a timer and auto focus and some basic configurable settings. The trick is not to place the camera too close to the model. The shots you see posted on this site are heavily cropped after they have been taken. If you get too close the camera can’t focus and the image will be blurred. Also, placing the camera a bit further from the model gives the model a better chance of being completely in focus – from nose to tail. This is important to the shot. The camera settings are set to give the biggest ‘focal depth’, or biggest ‘depth of field’. You need to check your camera’s functions – typically it’s not the function used for people/portraits but the one for scenery. You need to play; there may be some manual functions that allow you to set an even bigger depth of field. I think that getting the greatest depth of field – as much of the model in front-to-back focus as possible – is the single most important factor in taking realistic photos of models. Don’t try and use the settings for small, close up objects as this just seems to cause everything else other the immediate spot of your model be out of focus. By the way, the lens on my little camera performs better for these types of shots than the one on my more expensive Canon SLR.
[Update:] I now do use my SLR as my lovely photographer daughter bought a better lens for me. But… all the above still holds true and you can get a reasonable result from a simple point-and-shot pocket camera. A typical set of settings might be f/32, ISO at 100 with a 2 second exposure time – light source depending – with the camera on a tripod with a auto-timed shutter. If the model is very cleanly side-on I might reduce the f stop and reduce the depth of field.
Another factor is ISO. I tend to use something like 100 or 200. The bigger the number the more grain will be visible. Depends on the effect you are looking for. But since in many cases I will crop the original image very tightly – meaning that the final image will be ‘zoomed’ in on the subject and thus will be more likely to see the grain, I’ll stick to these lower values. Using a tripod or placing the camera on the table also helps here (or if using your phone, prop it up on it’s side).
The other essential camera setting is to make sure the camera uses the highest resolution setting – the most pixels for the image. Later, on a PC, this’ll allow you to crop in tight and still have a picture that doesn’t pixelate (look blocky and blurred).
Camera Position
This, is my view is vital to getting the realism into the shot. Humans are about 6feet (1.8m) tall so the lens of the camera needs to be somewhere around this height ‘scaled’ from the table top. About an inch or 2.5cm. The camera is positioned on the table surface, or held in a tri-pod just off the edge. Either way, this keeps it steady and also creates the correct angle for the shot – like someone standing on the ground in front of the real thing. Also, using the timer and keeping the camera steady on the table-top surface prevents motion blur when the auto settings for depth of field make use of a longer exposure (when the shutter stays open longer).
I take several shots using the timer (rather than my finger to press the shutter button) and usually taken with different settings set on the camera – I never seem to remember the best ones!
I don’t worry about ‘framing’ the shot. I just try and get good, bright and in-focus picture first.
PC Image Editing
This is as important as taking the images… On the PC I use a free-bee image editor (Photoshop-like – Photoscape is pretty good and has a range of aged image overlays that are easy to apply, and it’s free) to crop the image in tight on the subject, may be do a tweak rotation by a few degrees and then I adjust the brightness, contrast and de-saturate the colour a bit (take out the strength from the colour; sort of heading towards black and white). That’s about it. In some other images I have played a bit more – like adding an old-style film grain or that sun burst. Oh, and I blur the edges of my background image together so that you can’t see the joins between the A4 sheets.
I also use the PC to do some image editing to make the image look more ‘period’ or ‘aged’. Generally I’ll add a noise or grain effect to simulate the grain of a photograph and I’ll remove the colour. There are other effects on offer, like overlays that simulate distressed old photographs, but this is the fun part – trial and error, see what works.
Set up
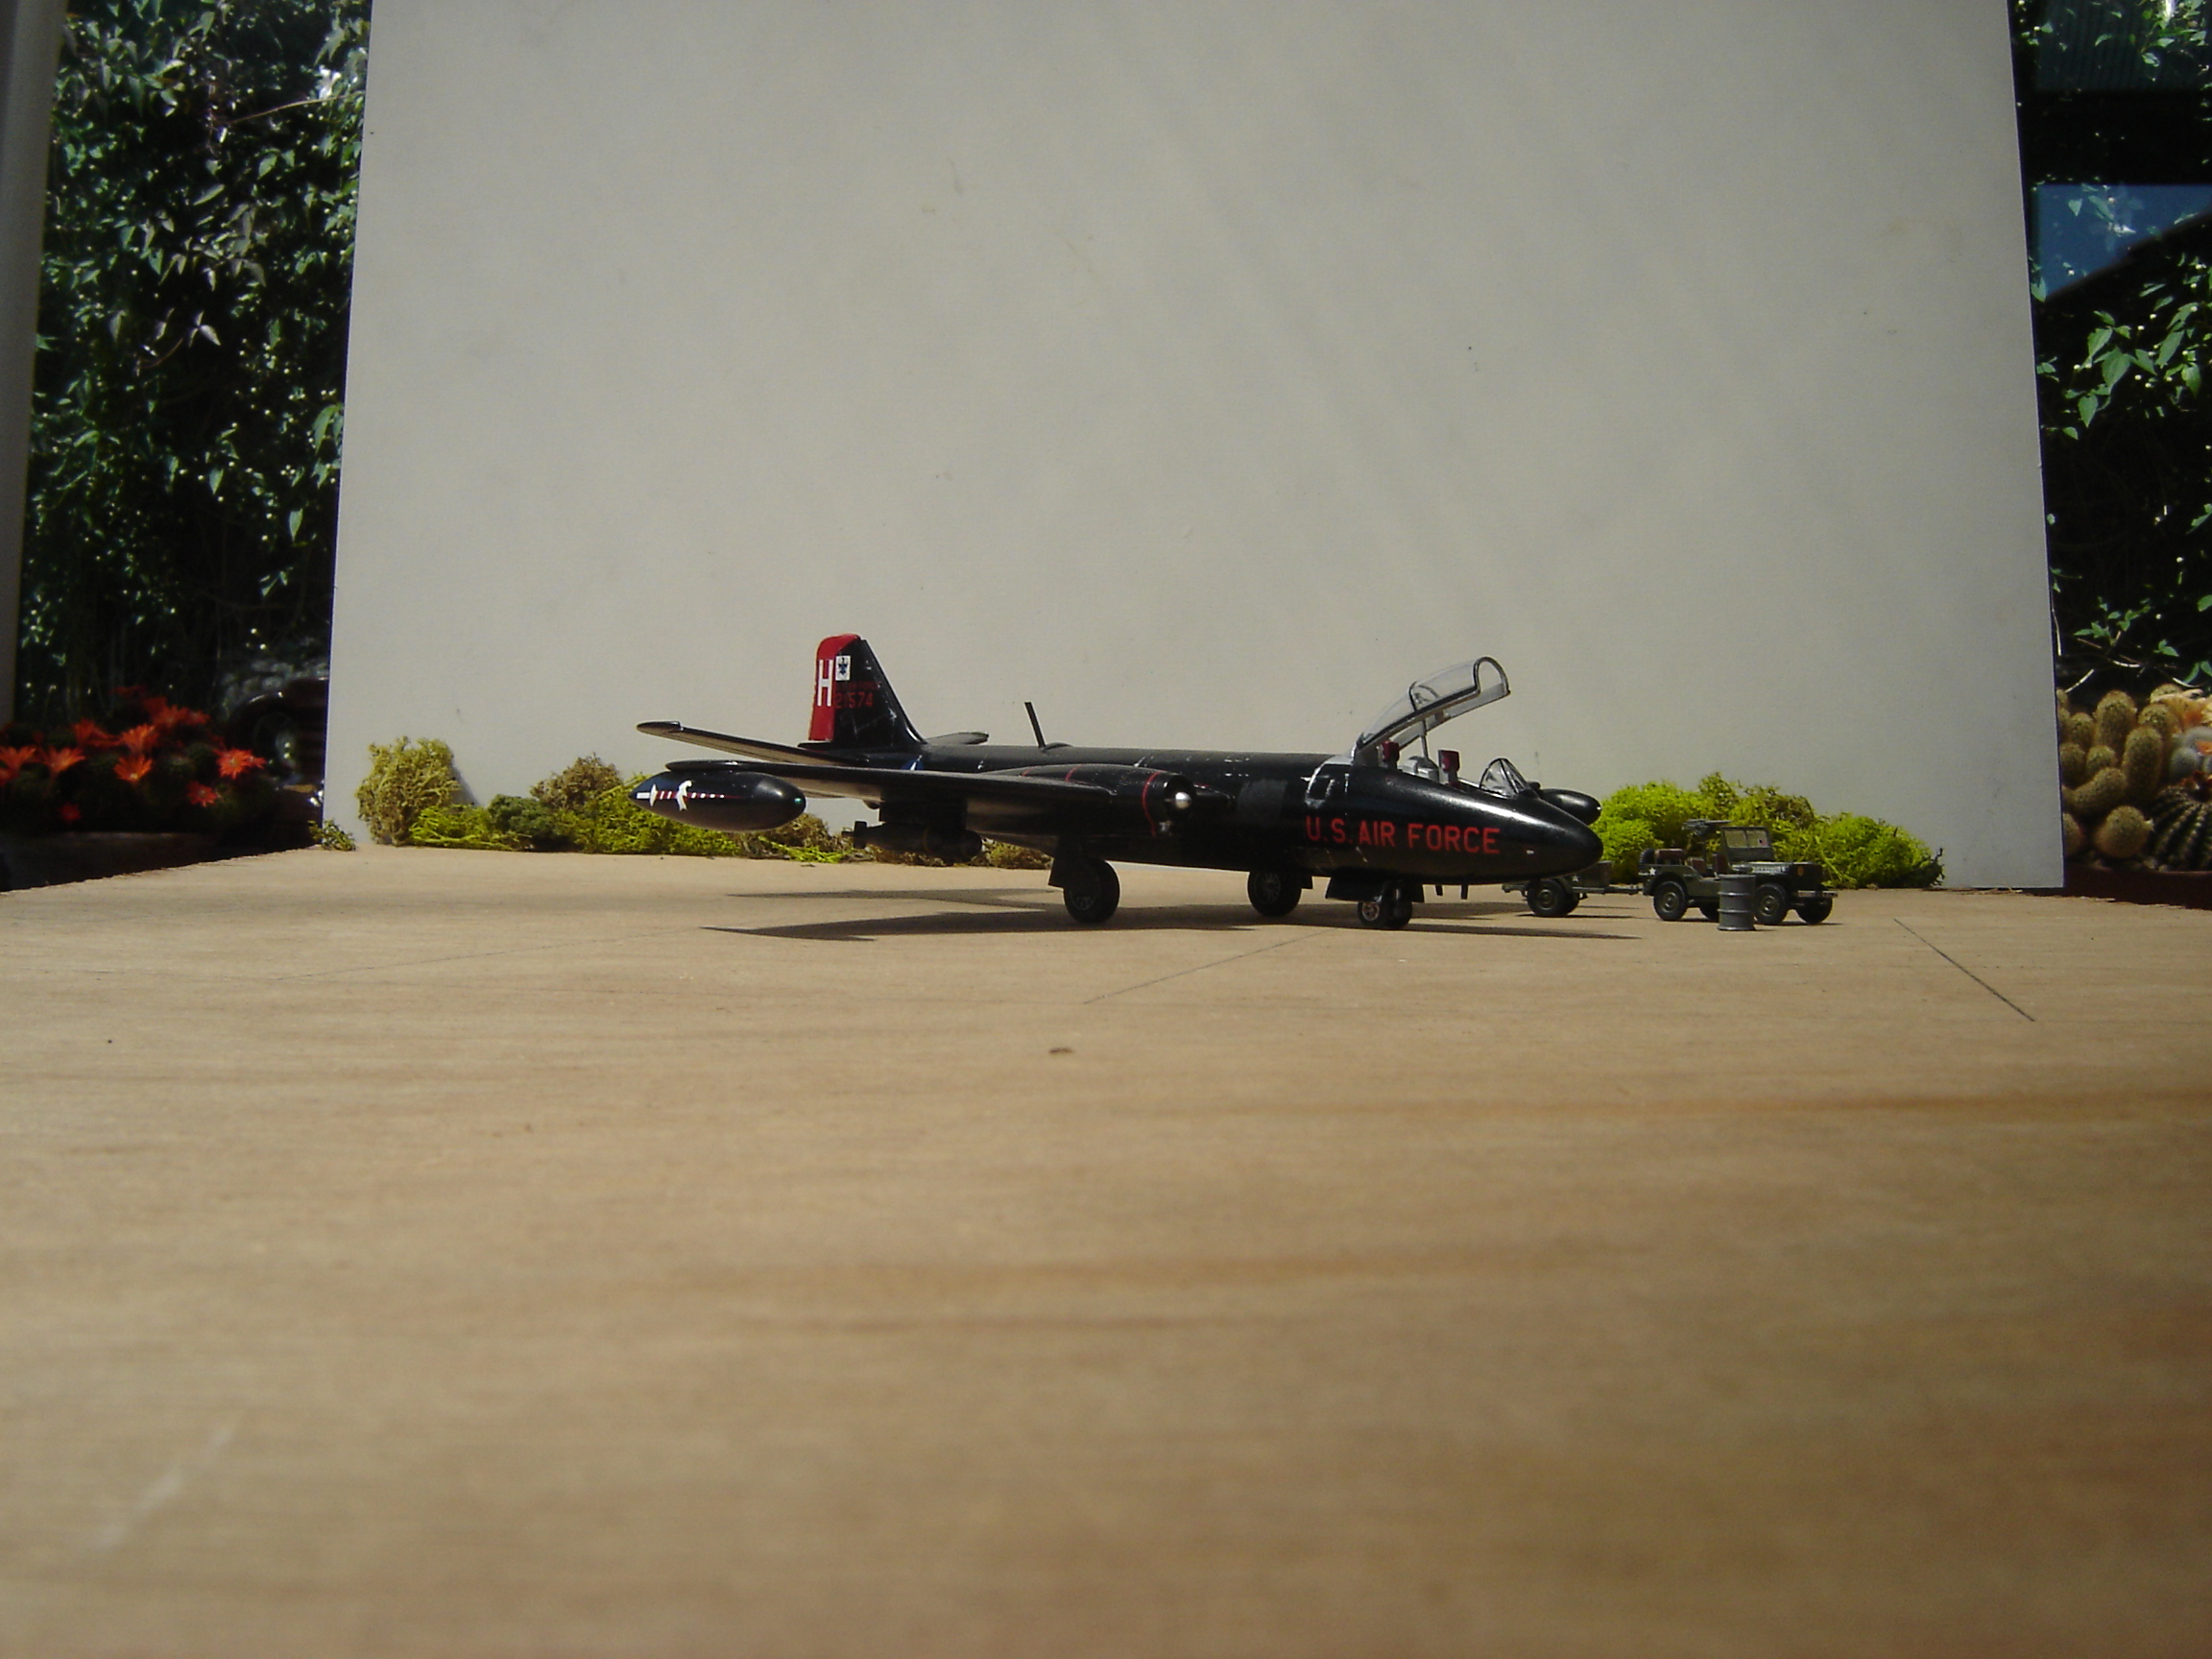
Here’s a pic of the set up…
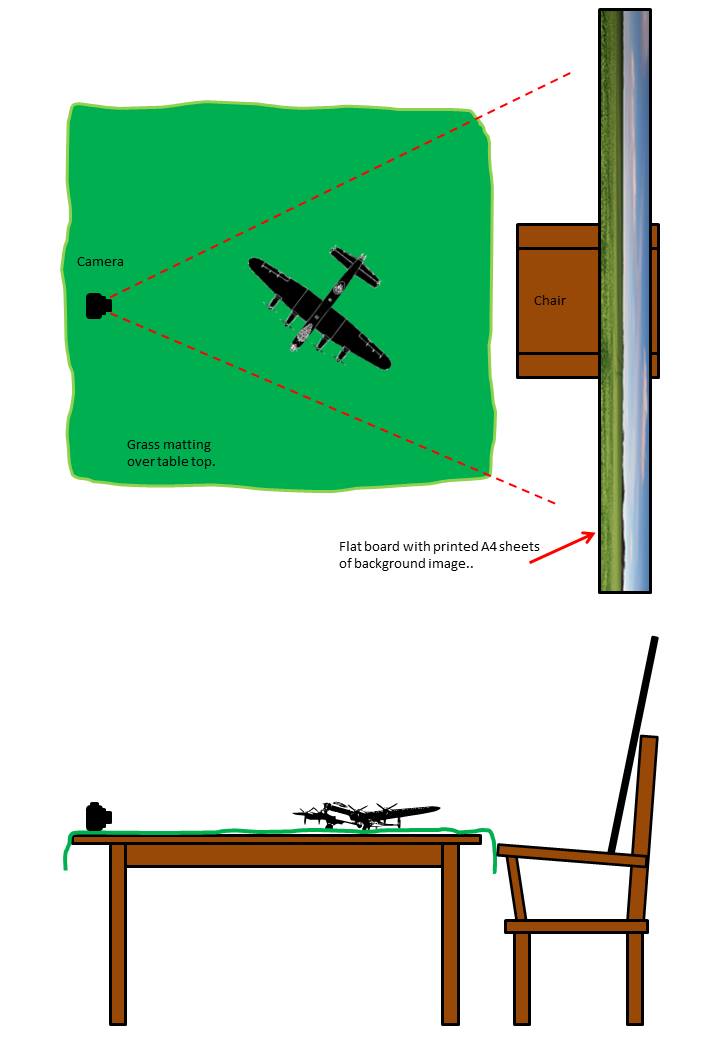
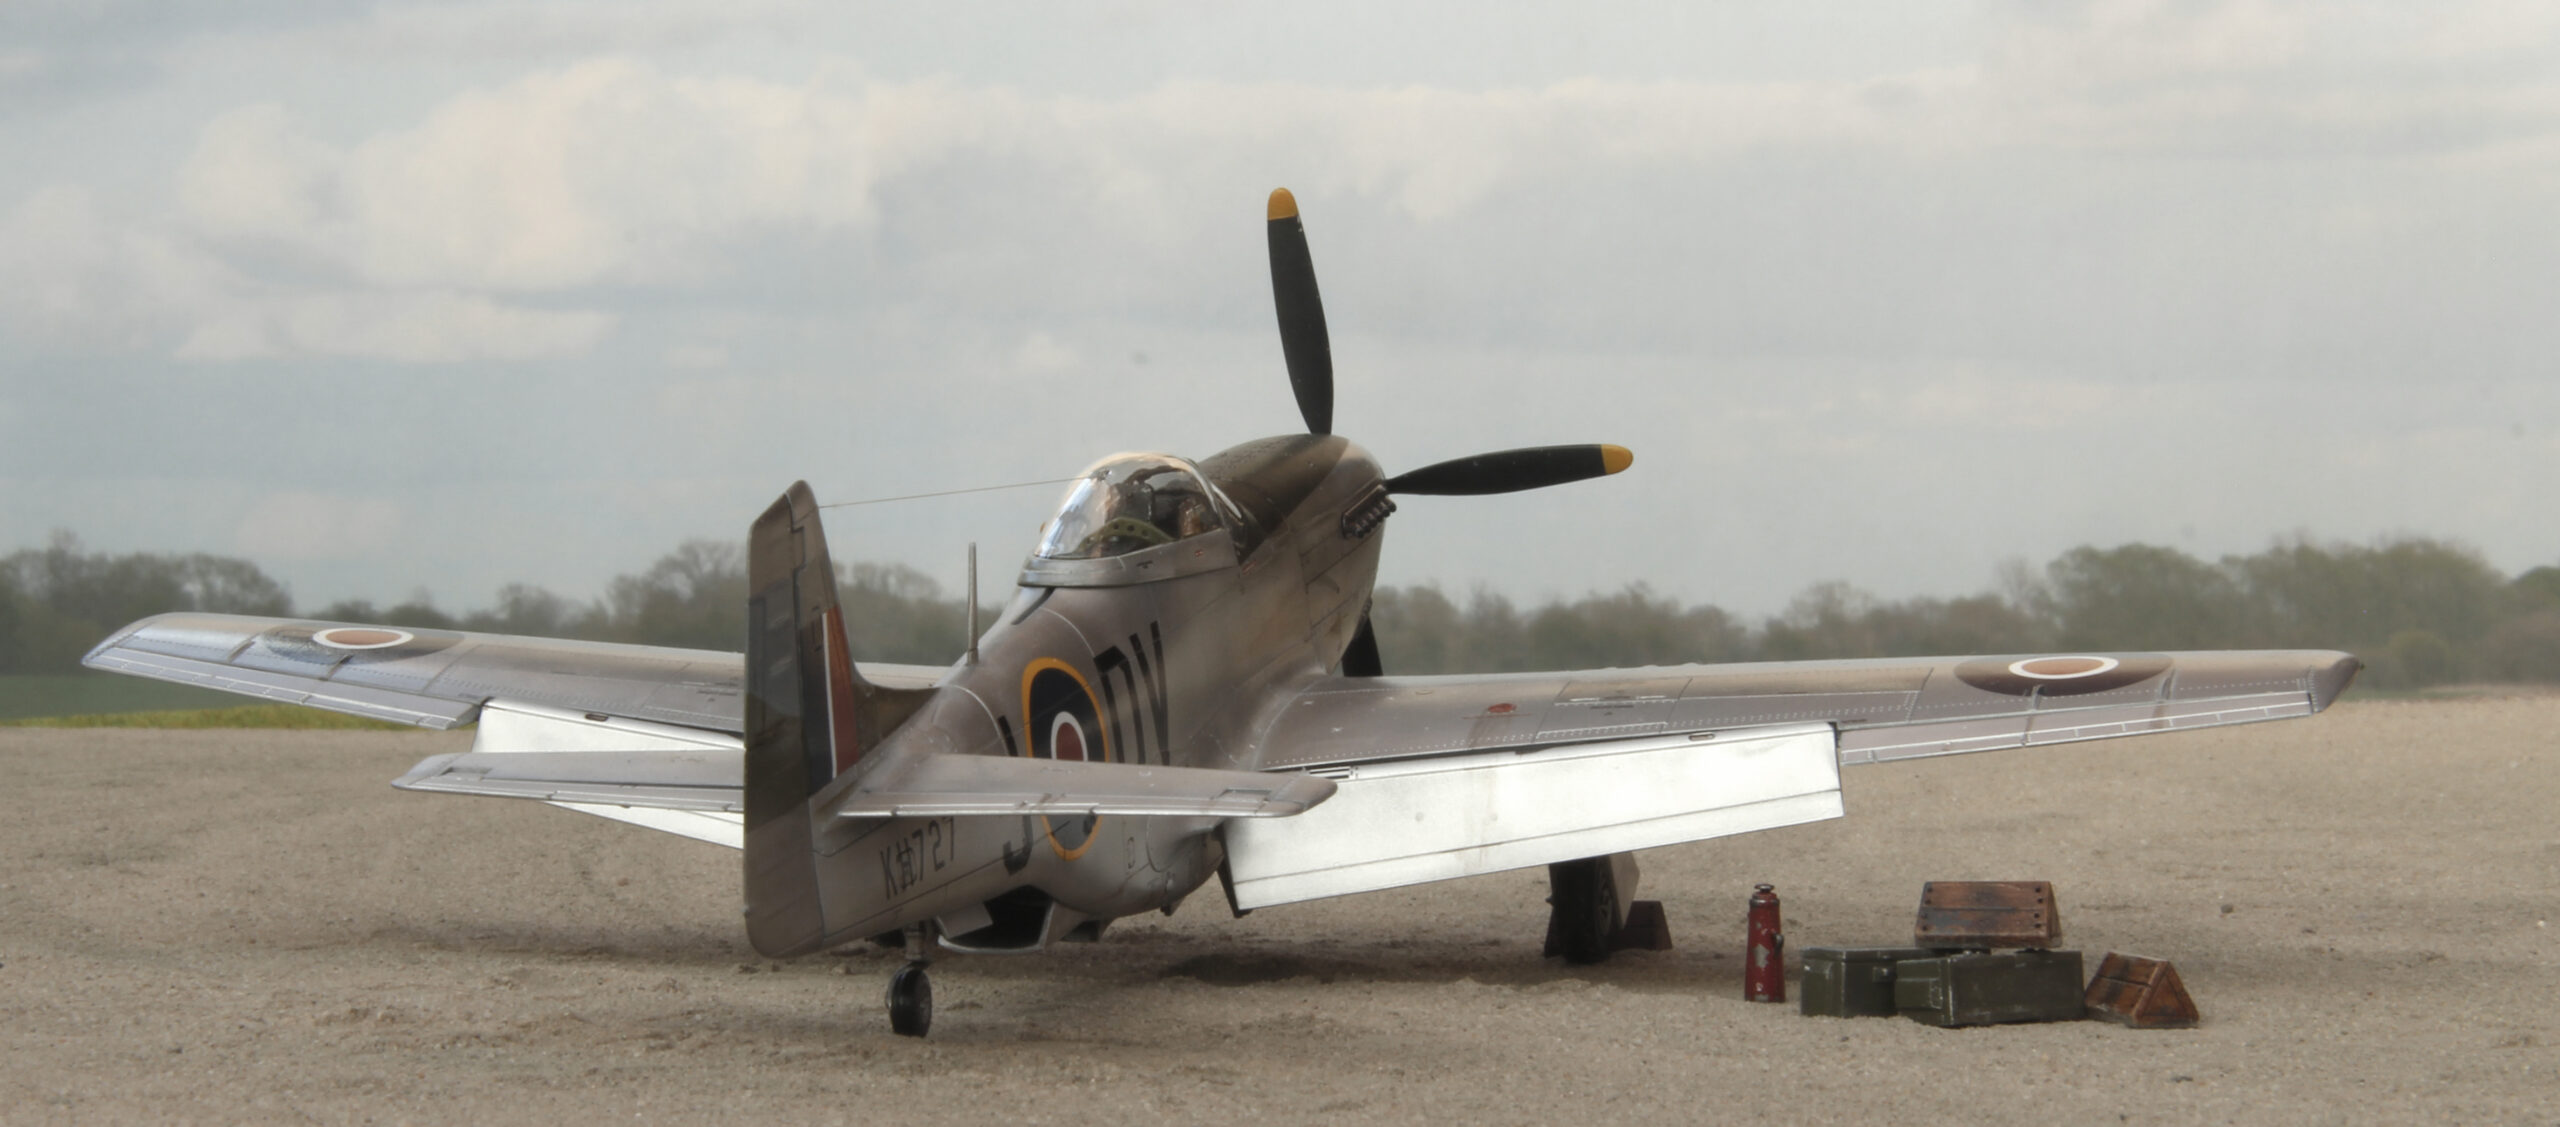
Here’s what it looks like in reality…

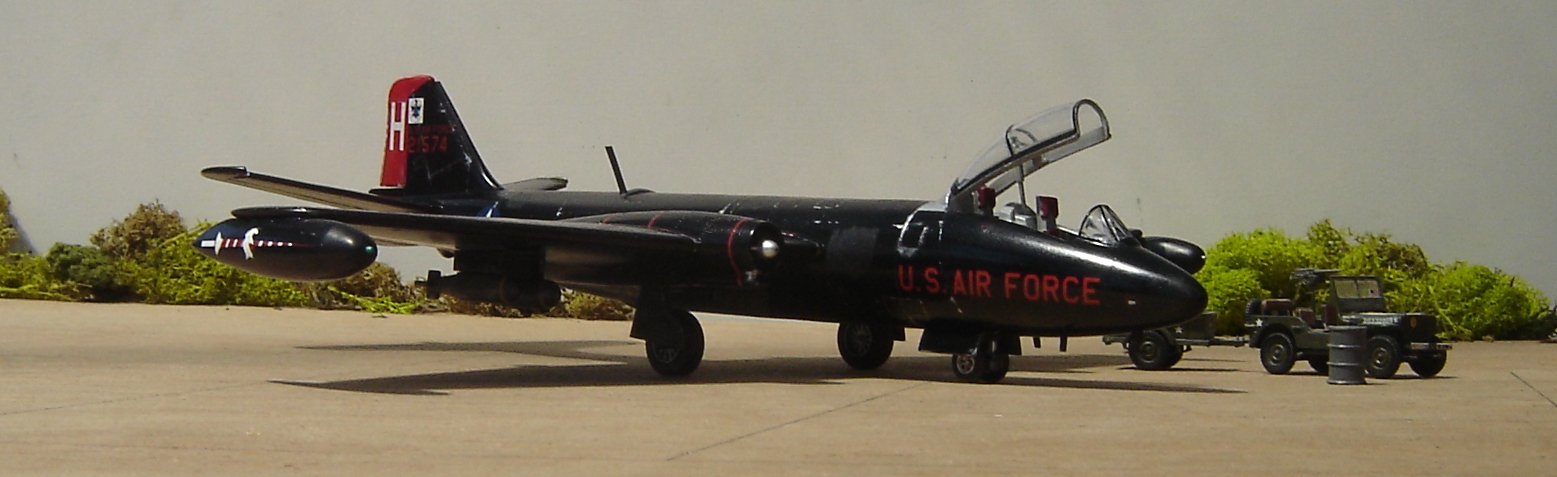
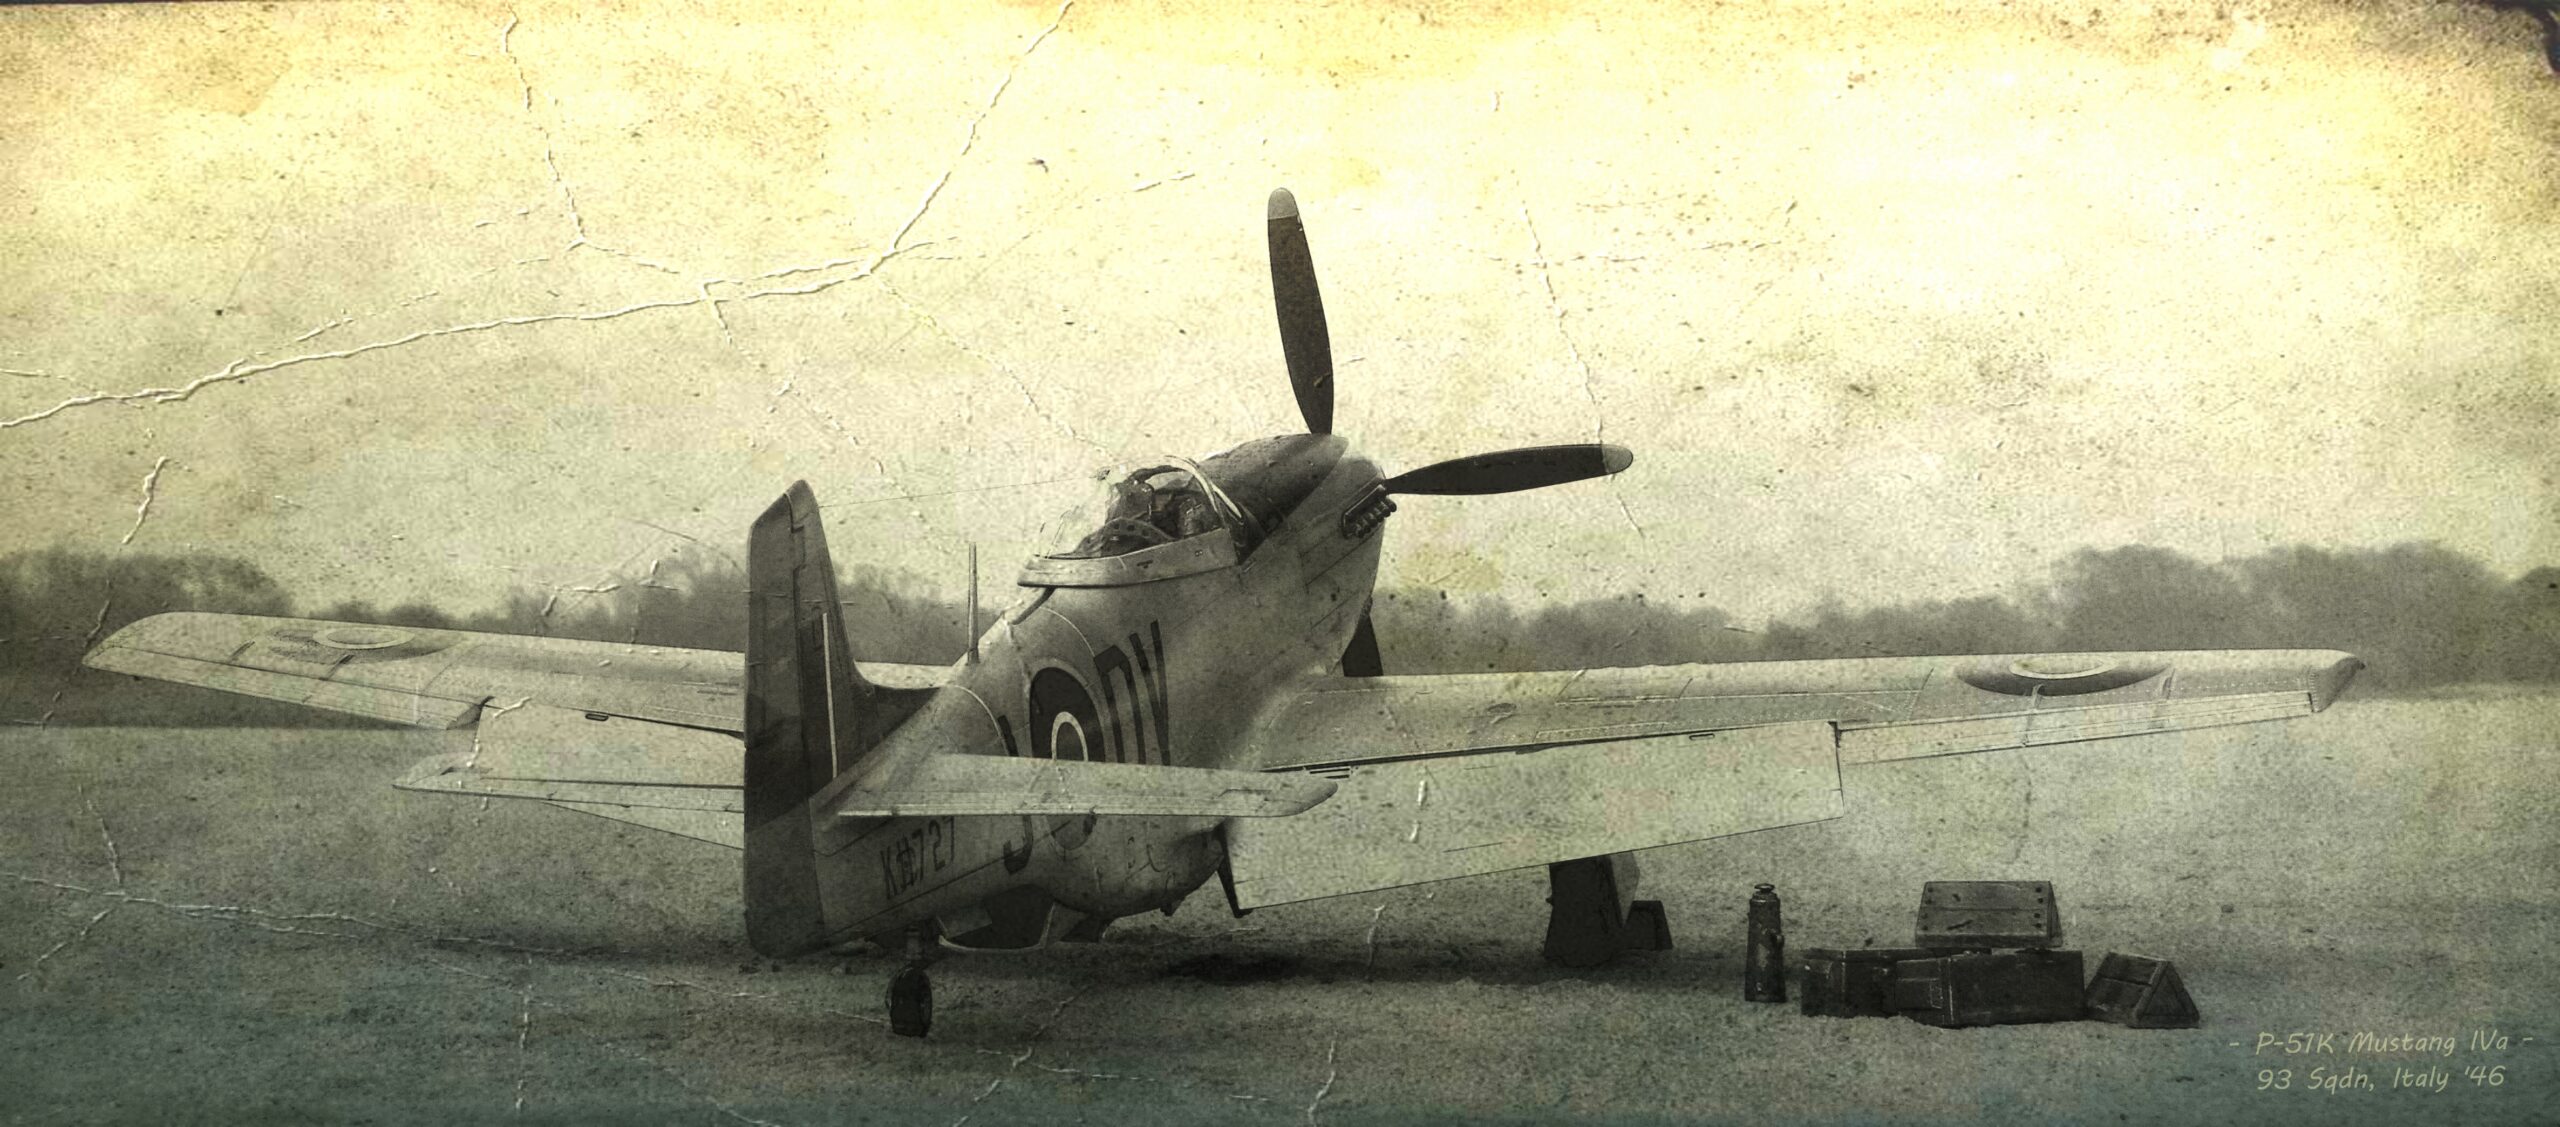
And the final image…
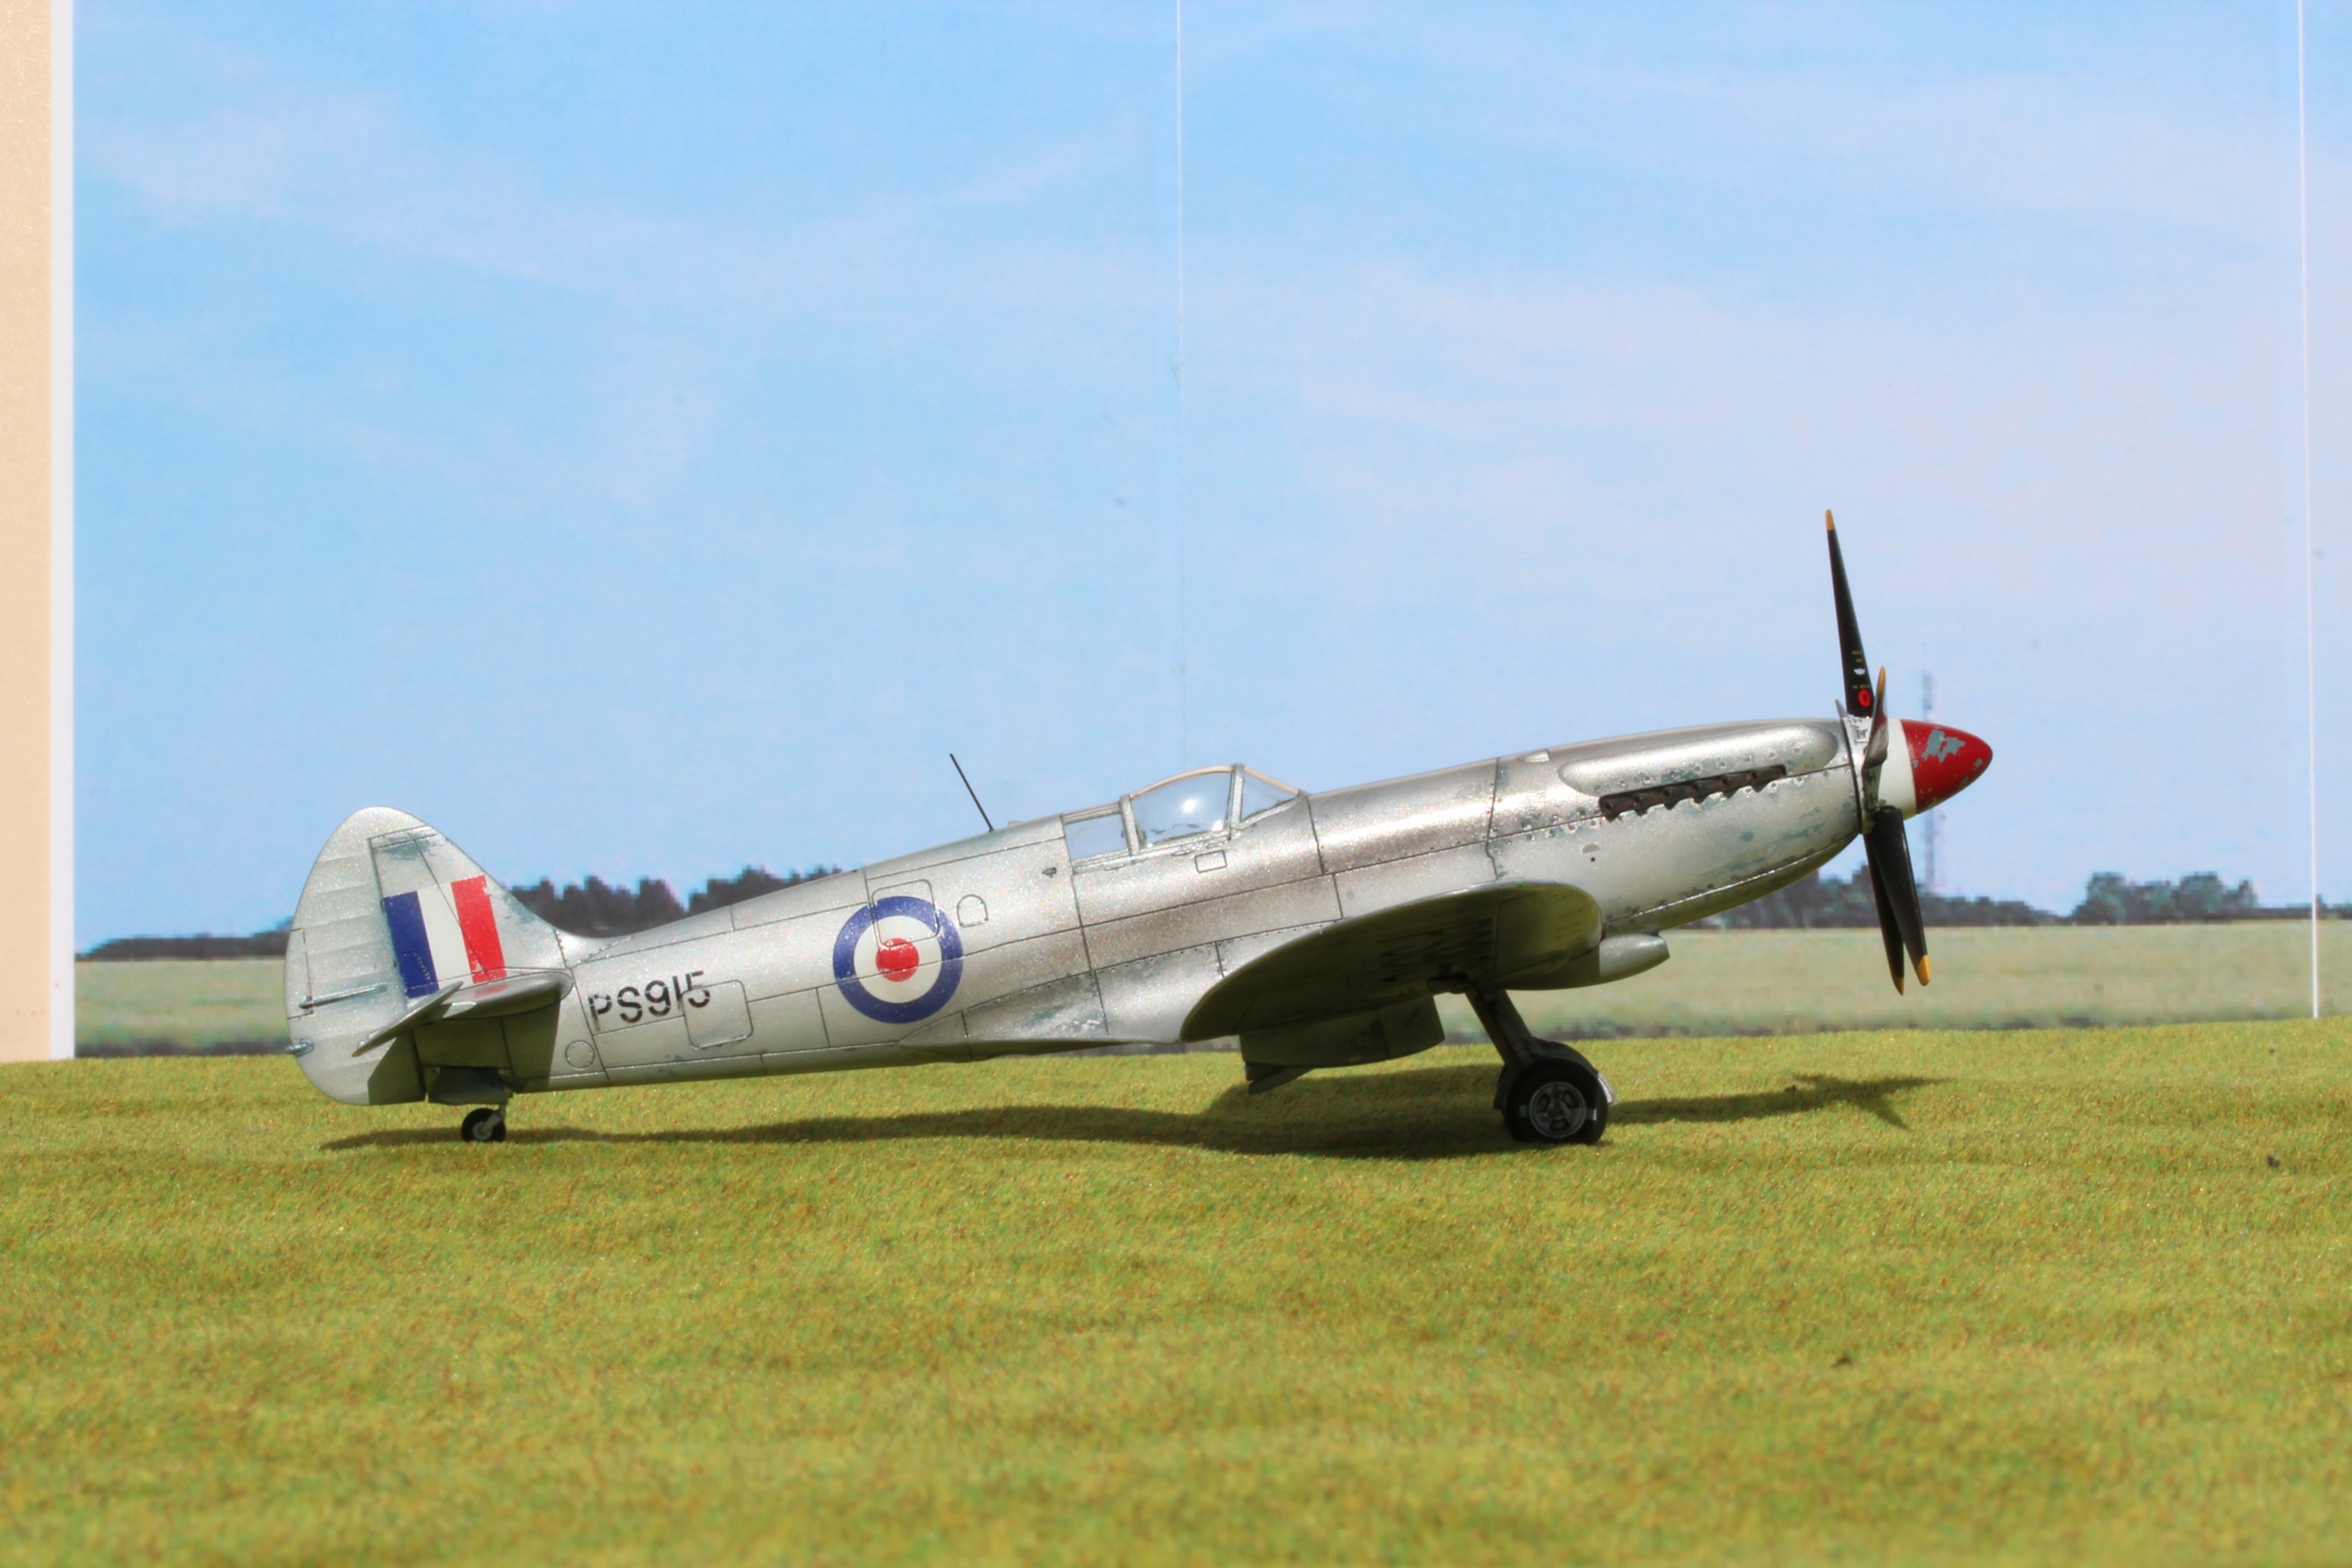
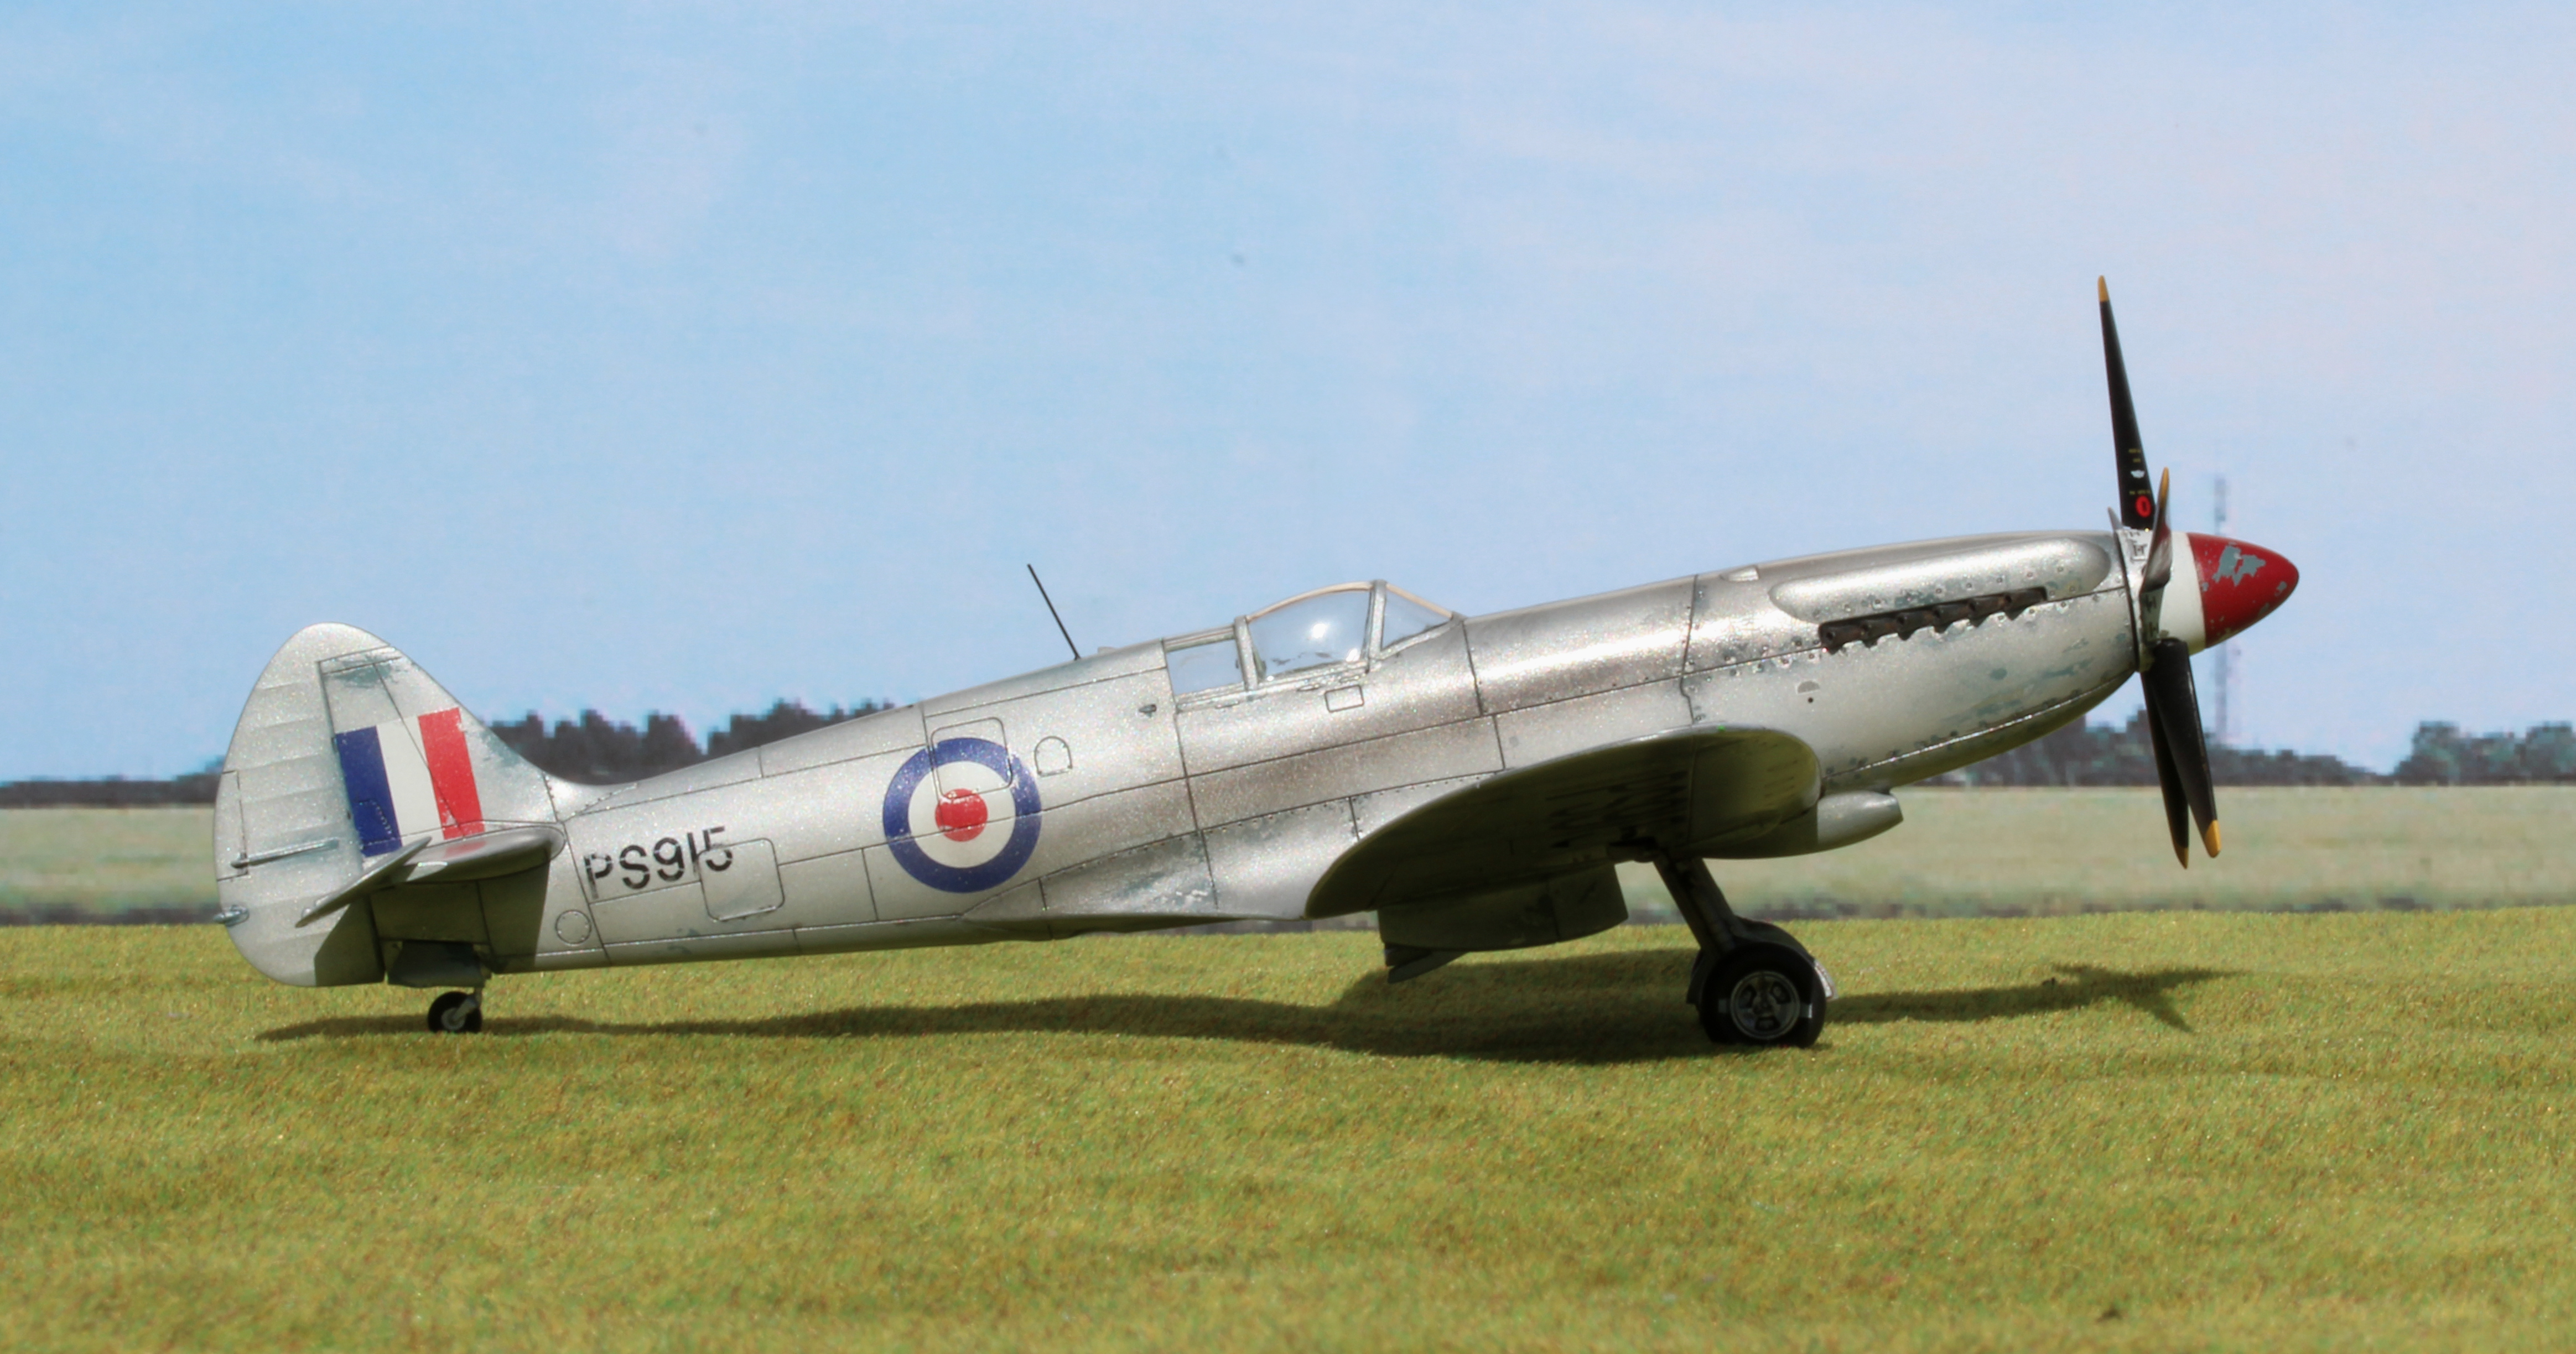
Examples